We’re excited to announce a brand new series here on the Gray Malin blog today… Each month we’ll be sharing a manicure inspired by one of Gray’s prints! We teamed up with the talented team at
Olive & June, our favorite experts in the nail art department. We knew that they would be able to bring Gray’s gorgeous photos to life in the form of manicures, and each month they’ll be showing us the step-by-step process you can follow to get each mani. From beach umbrellas to Swiss Alps ski scenes, prepare yourself for some major getaway-inspired nail art from here on out!


Today, we’re recreating one of our favorite of Gray’s prints that just so happens to be on sale for only $99 today only:
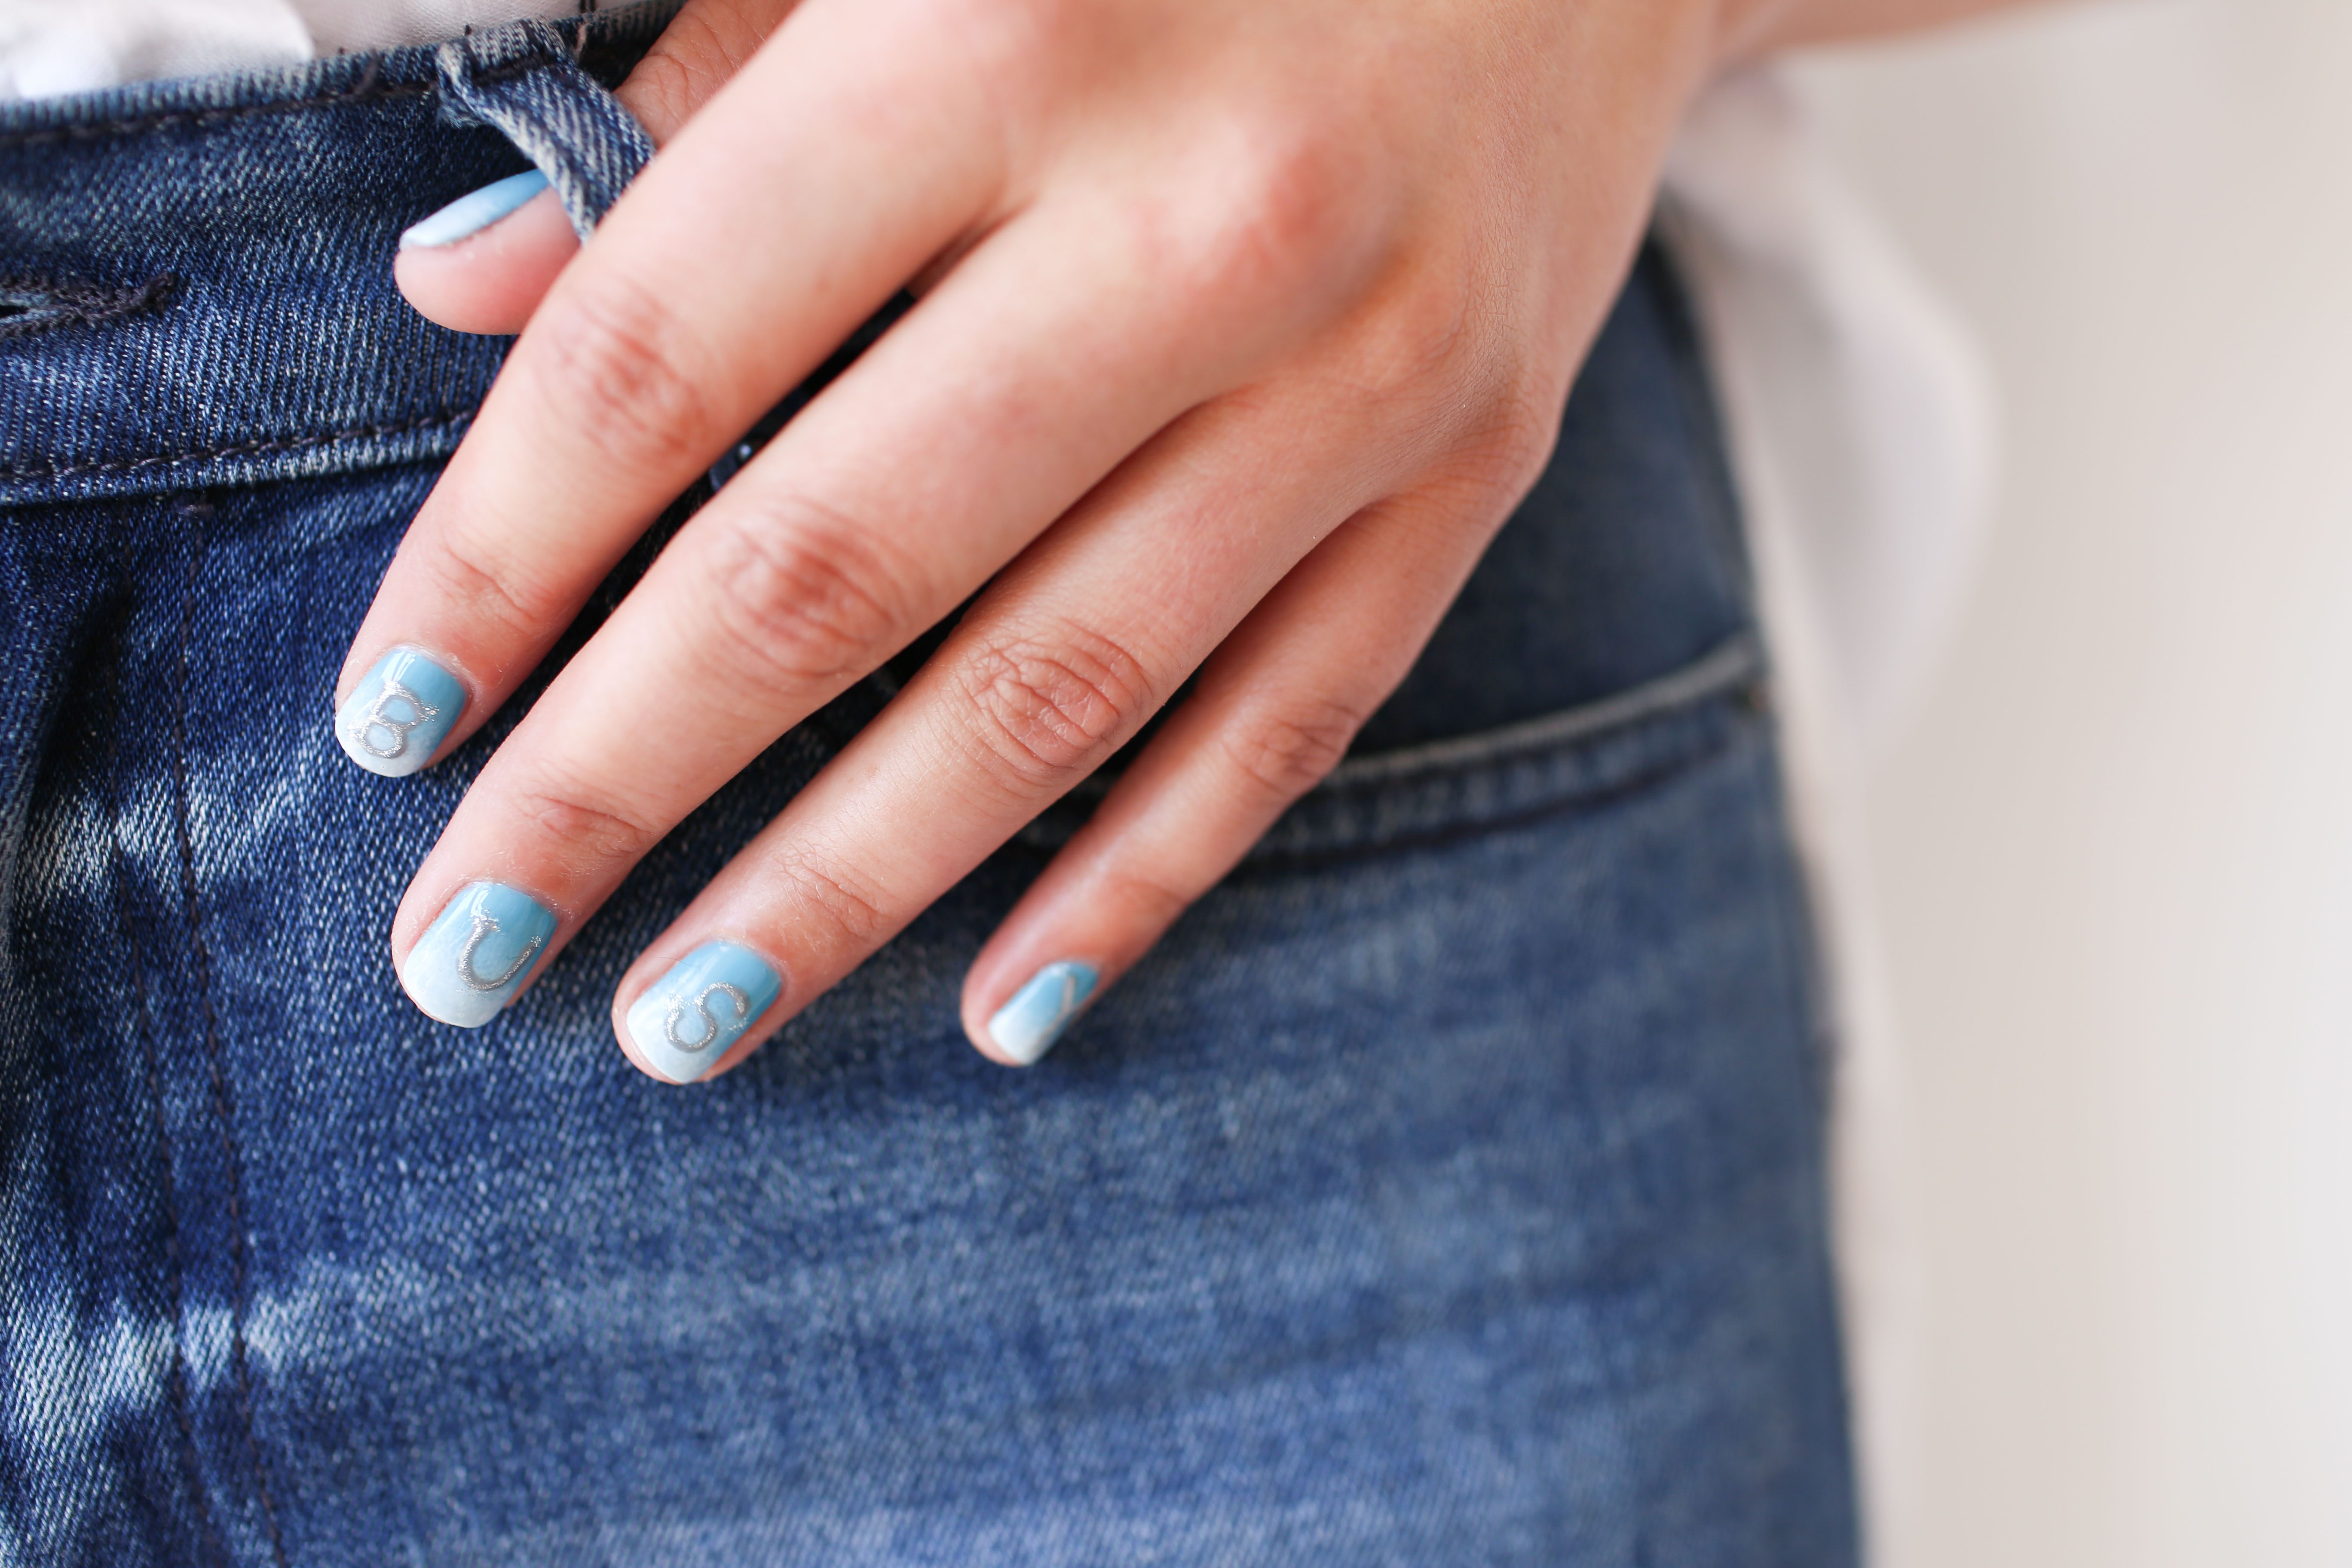
“I Am Busy”. It’s the perfect piece of art to hang on the wall of your home office or above your desk. Because, after all, who _isn’t_ busy these days? Take a peek below to see how we spent our day at the salon getting our
“I Am Busy” manicure, and check out the steps to create this manicure yourself…

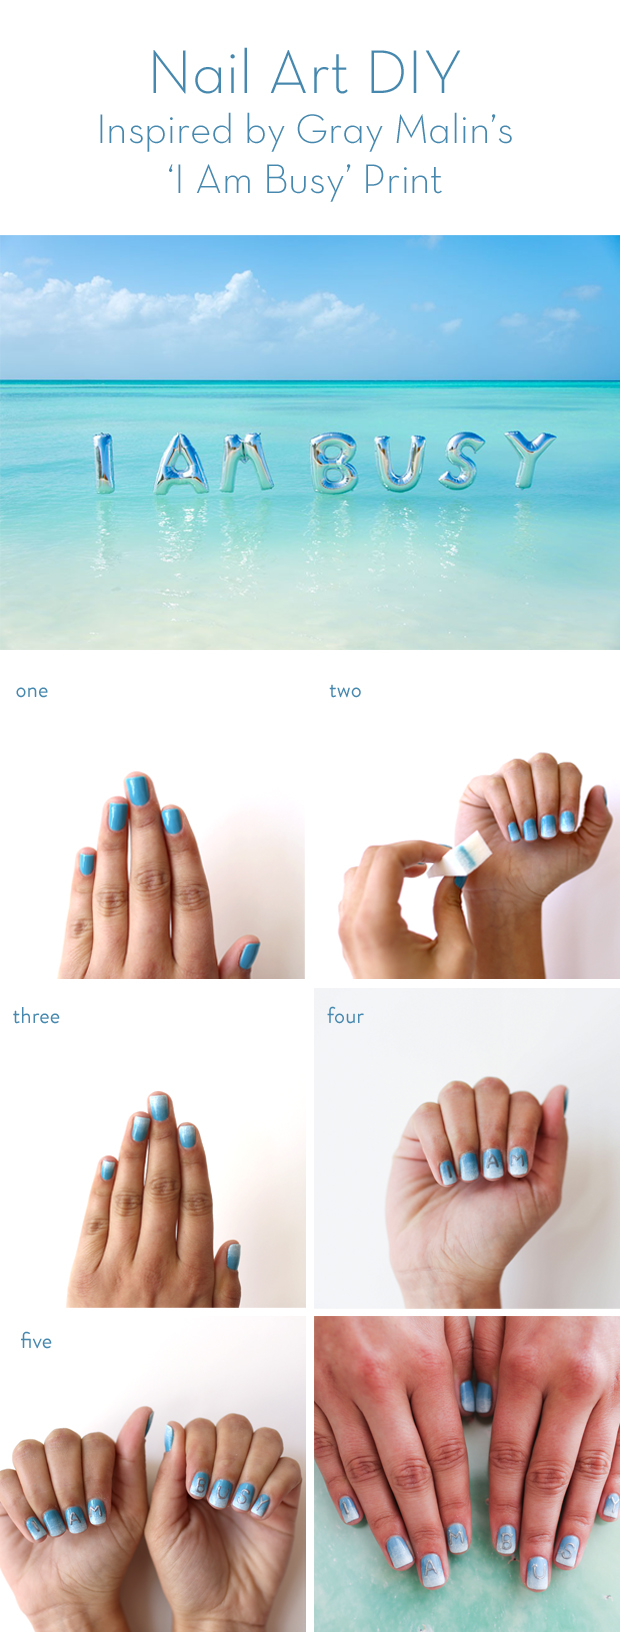
**Step 1:** Start by giving your nails a base coat, then paint with a bright blue polish color, like
Nars Ikiru. Let dry. **Step 2:** Then, paint a sponge with an ocean blue polish color (like
Essie Borrowed & Blue), and gently dab on the tips of your nails creating an ombré effect. Let dry. Then, repeat this step using white polish and dabbing on the very tip of your nails. This should create an ombré effect that goes from white to light blue to darker blue. **Step 3:** Once the polish is dry, take a
thin nail art brush and begin brushing your letters with a dark gray color. We spelled out “I Am Busy” by putting a space between each word. Make sure to make the letters rounded if you want them to look like the balloons in the print! **Step 4:** Let the letters dry and add a shimmery layer of silver over the letters. Let dry. **Step 5:** For a little extra sparkle, add a touch of glitter polish to the corner of each letter. Top off with your favorite clear polish, and then just sit back and admire!

We hope you liked this nail art tutorial as much as we enjoyed creating it. Another big thanks to the ladies over at
Olive & June for helping us create this design. And don’t forget to scoop up our
“I Am Busy” print while it’s still on sale for just $99!

**What print-inspired manicure would you like to see us feature here on the blog next?** Let us know on Instagram and be sure to tagphotos with #GrayMalin if you try this manicure out for yourself! Xx Team GM


 Today, we’re recreating one of our favorite of Gray’s prints that just so happens to be on sale for only $99 today only: “I Am Busy”. It’s the perfect piece of art to hang on the wall of your home office or above your desk. Because, after all, who _isn’t_ busy these days? Take a peek below to see how we spent our day at the salon getting our “I Am Busy” manicure, and check out the steps to create this manicure yourself…
  **Step 1:** Start by giving your nails a base coat, then paint with a bright blue polish color, like Nars Ikiru. Let dry. **Step 2:** Then, paint a sponge with an ocean blue polish color (like Essie Borrowed & Blue), and gently dab on the tips of your nails creating an ombré effect. Let dry. Then, repeat this step using white polish and dabbing on the very tip of your nails. This should create an ombré effect that goes from white to light blue to darker blue. **Step 3:** Once the polish is dry, take a thin nail art brush and begin brushing your letters with a dark gray color. We spelled out “I Am Busy” by putting a space between each word. Make sure to make the letters rounded if you want them to look like the balloons in the print! **Step 4:** Let the letters dry and add a shimmery layer of silver over the letters. Let dry. **Step 5:** For a little extra sparkle, add a touch of glitter polish to the corner of each letter. Top off with your favorite clear polish, and then just sit back and admire!
  We hope you liked this nail art tutorial as much as we enjoyed creating it. Another big thanks to the ladies over at Olive & June for helping us create this design. And don’t forget to scoop up our “I Am Busy” print while it’s still on sale for just $99!
  **What print-inspired manicure would you like to see us feature here on the blog next?** Let us know on Instagram and be sure to tagphotos with #GrayMalin if you try this manicure out for yourself! Xx Team GM


